Virtuino SE Tutorial: Communicate with Arduino Uno and ESP8266-01 module
Step1:
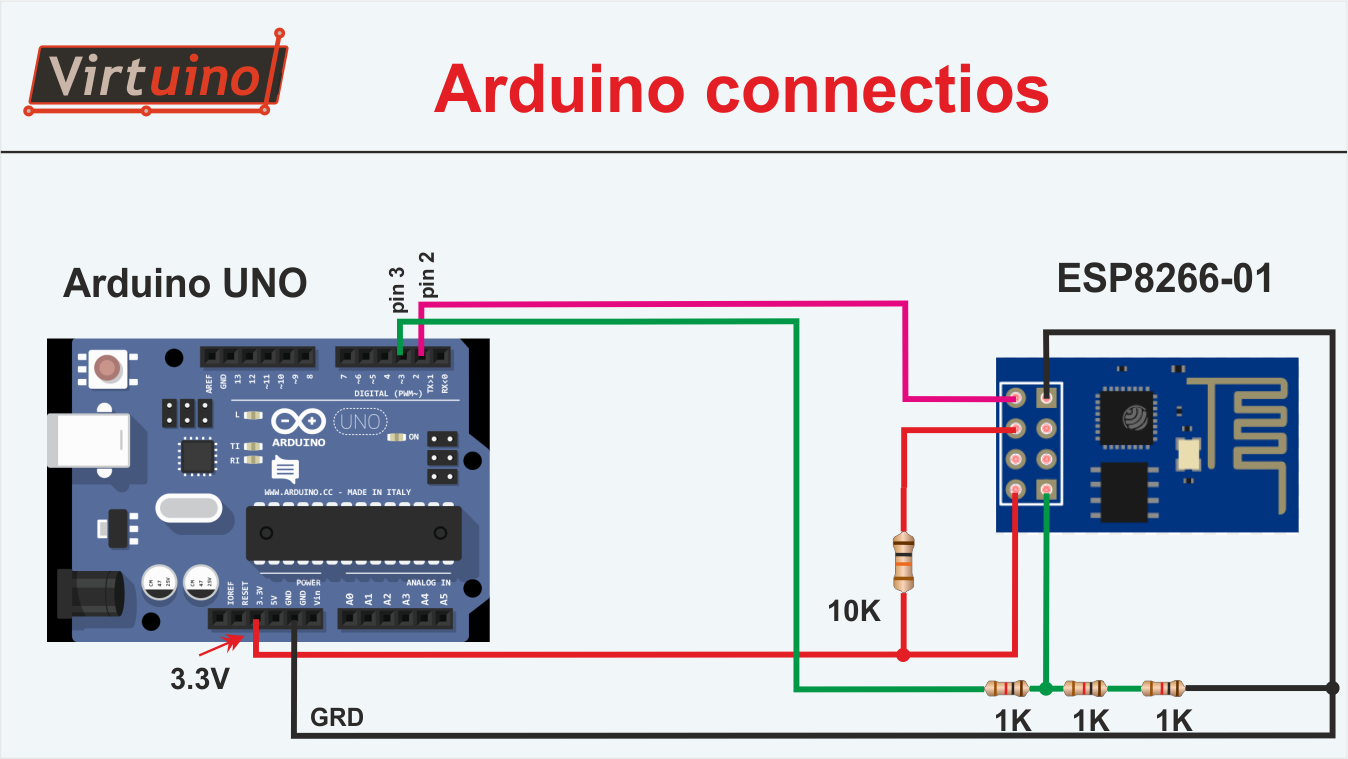
Connect the ESP8266-01 module to Arduino Uno board using the plan below
Step2:
Download the following example:
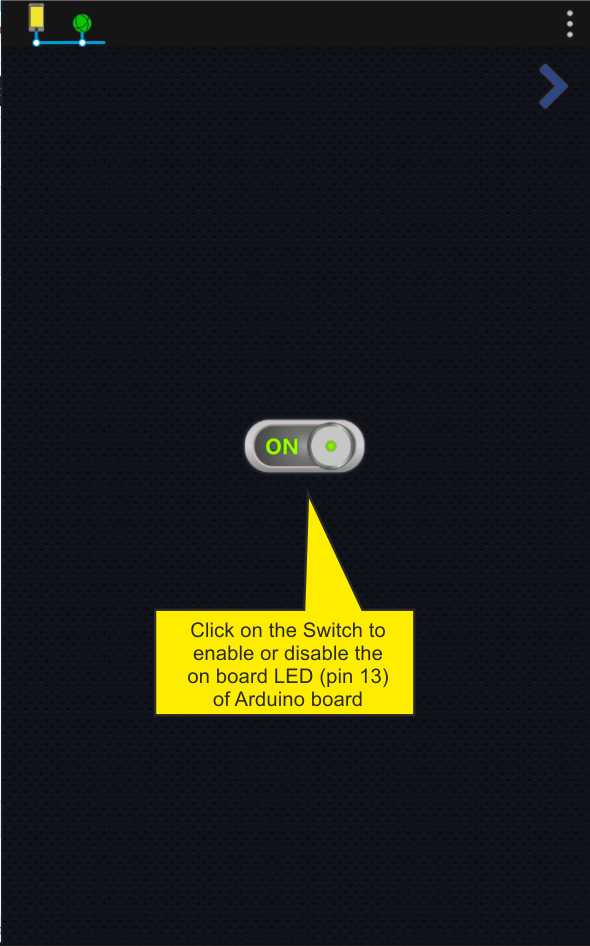
Example:How to enable or disable the on board led (pin13) JSON API
Unzip and load the example to Arduino IDE software
Step3:
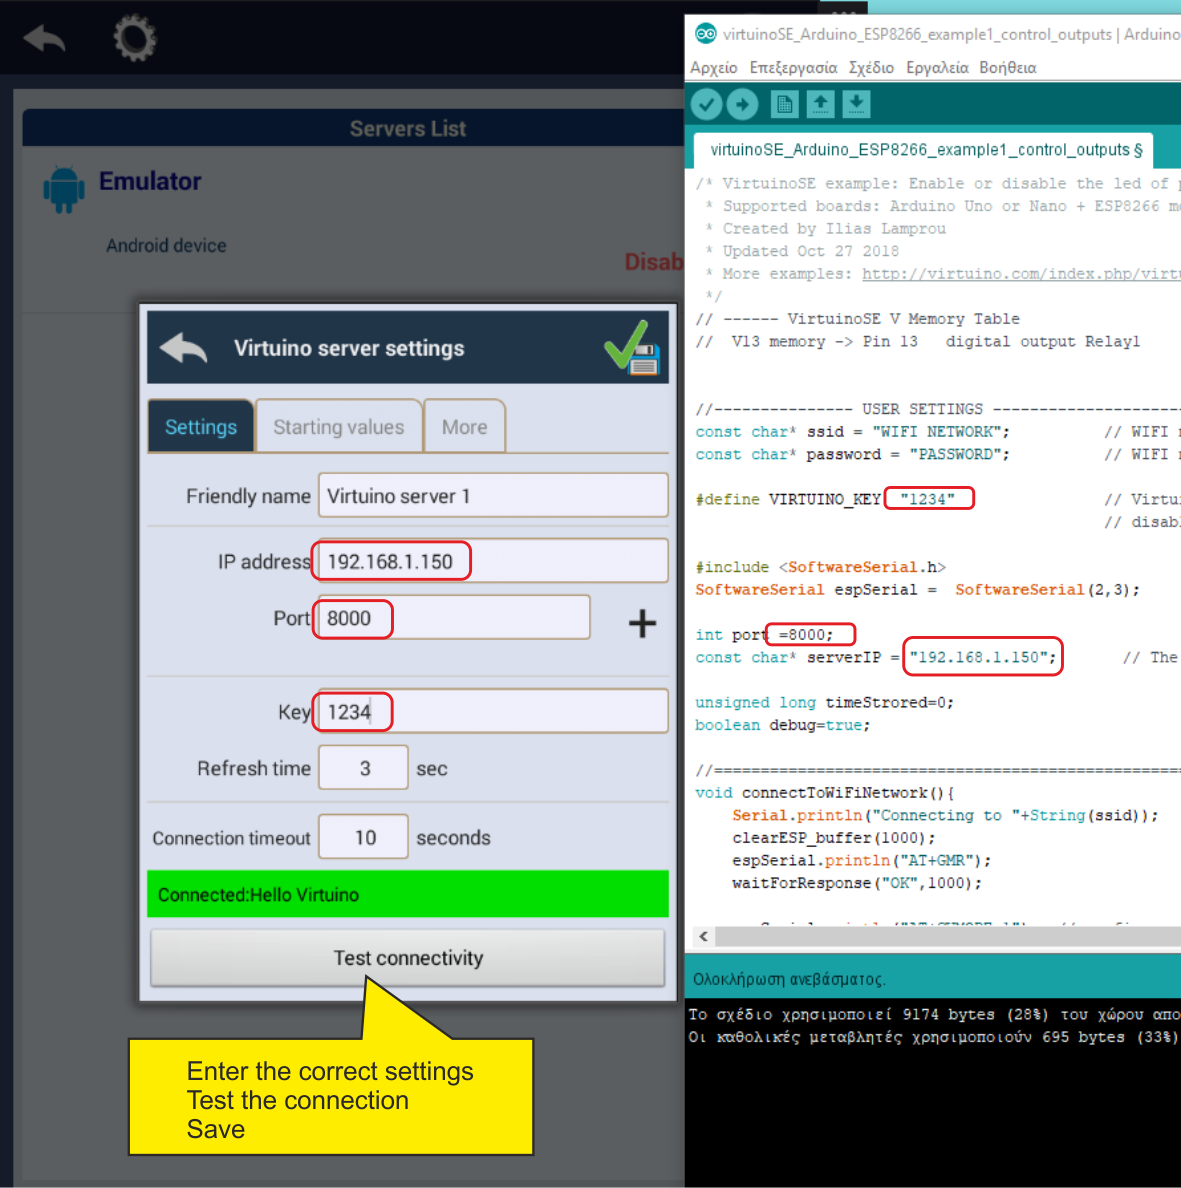
Configure the example code
1. Enter the name (SSID) and password of your WiFi network to the code

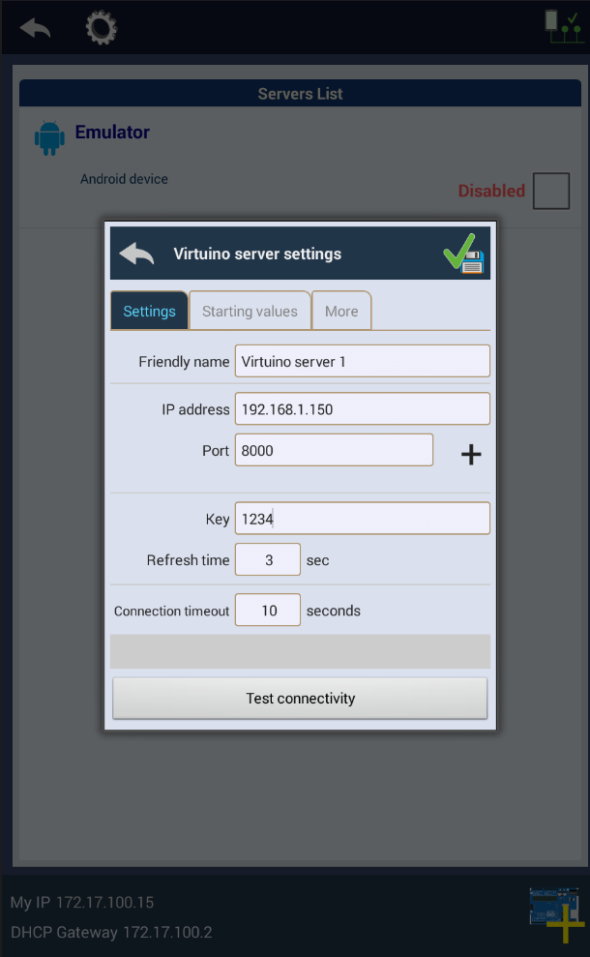
2. Enter an IP address for your ESP8266-01 module
The IP has to have the same three first numbers with your router IP
For example if your router IP is 192.168.1.1 select an IP like 192.168.1.150

3. Enter the serial baud rate of your ESP8266-01 module to the void setup()
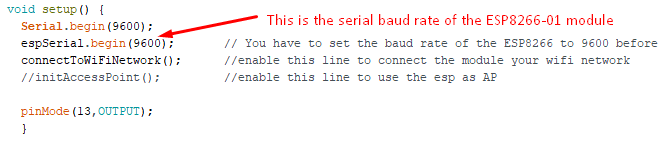
A new ESP8266 module will probably have the baud rate at 115200. You have to change the ESP8266-01 baud rate to 9600 before uploading this example. The example uses the Software serial object which doesn't work at 115200.
The best way is to use a Serial test code to test the module and configure the baud rate of it to 9600.
Take a look at this video (minutes 1:30 - 9:00) on how to change the baud rate of the ESP8266-01 module
https://www.youtube.com/watch?v=KpDteD95T9o&t=54s
4. Connect the Arduino board to usb, select the Arduino uno board and the correct port and upload the example to the board
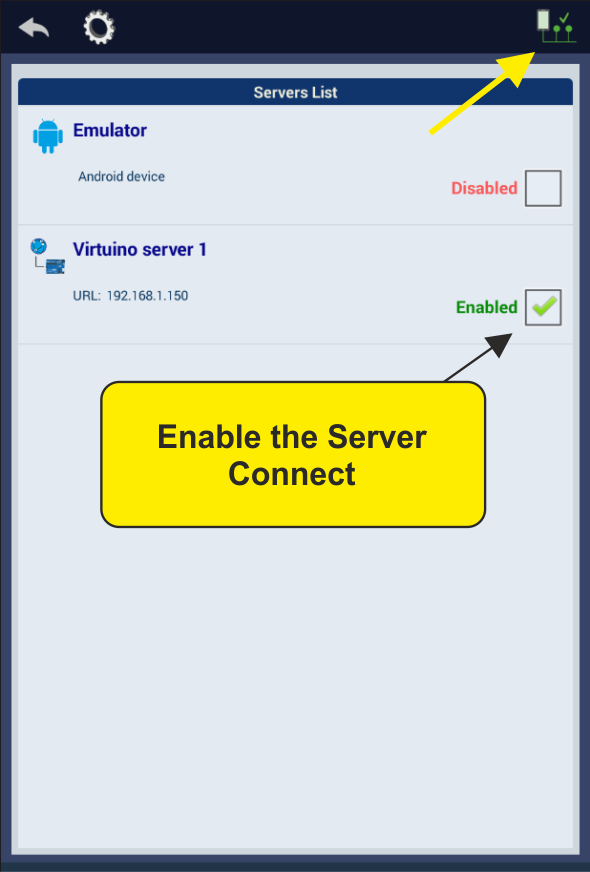
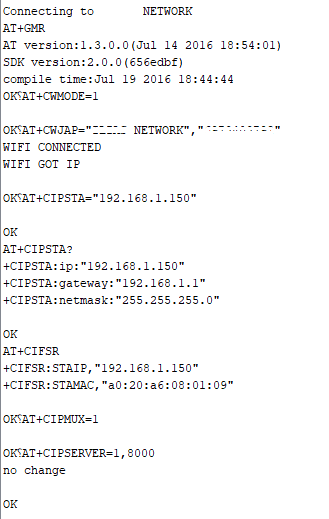
Open the serial monitor and check if the module can communicate with the board and the check if it is connected to your WiFi Network
Step4:
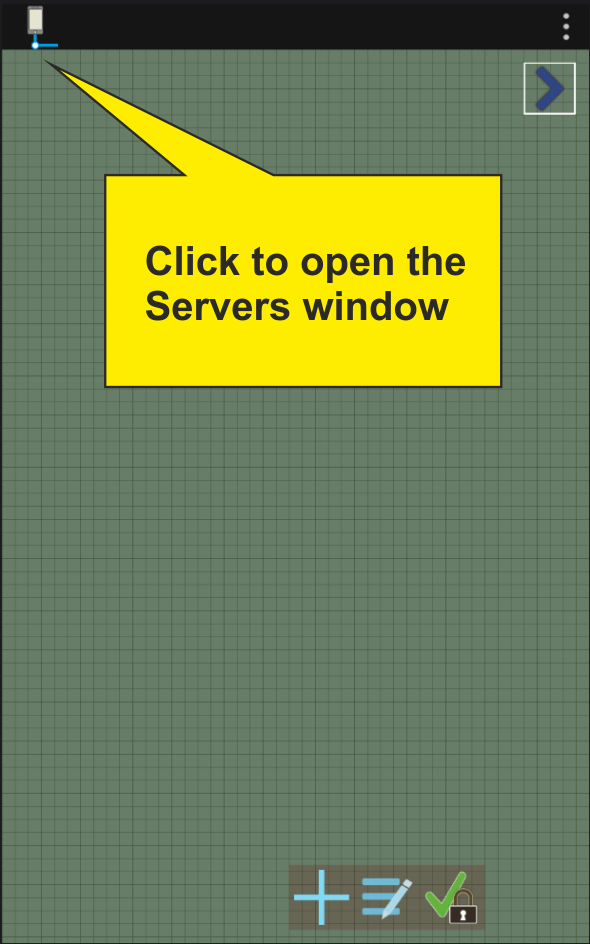
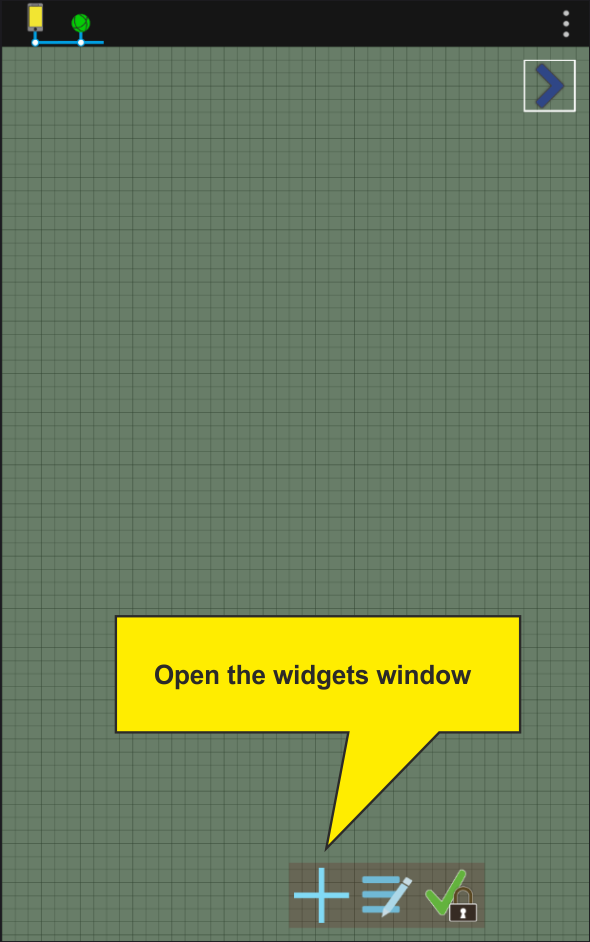
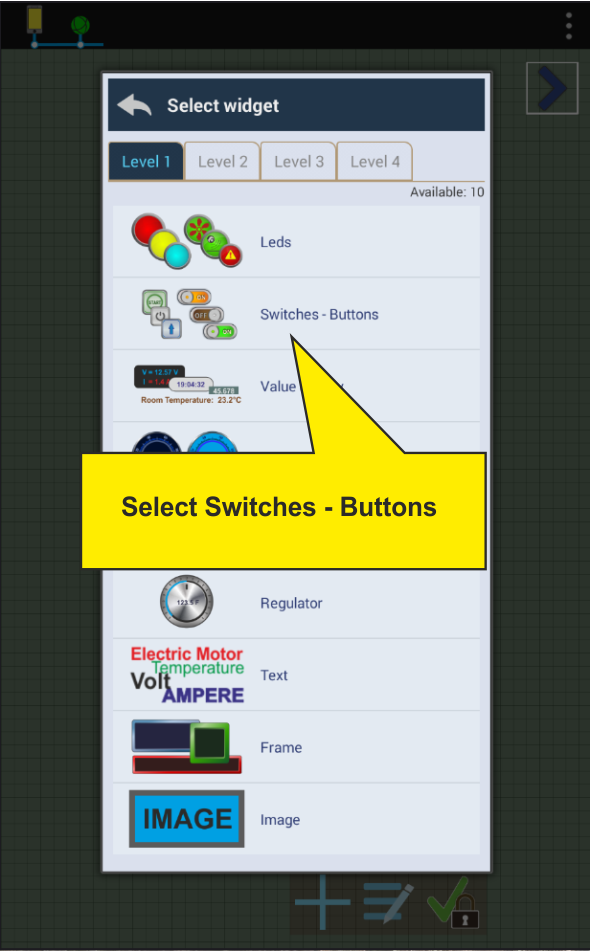
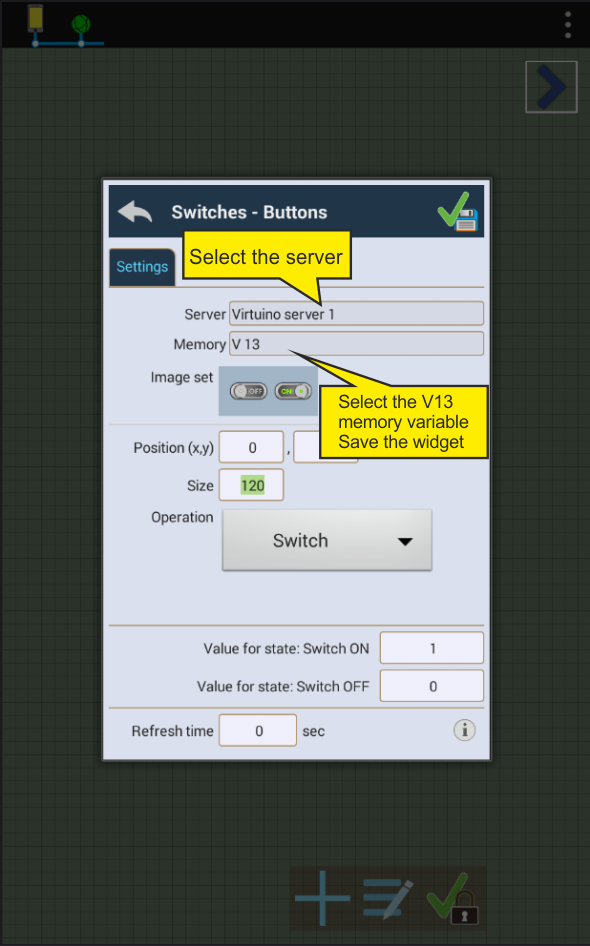
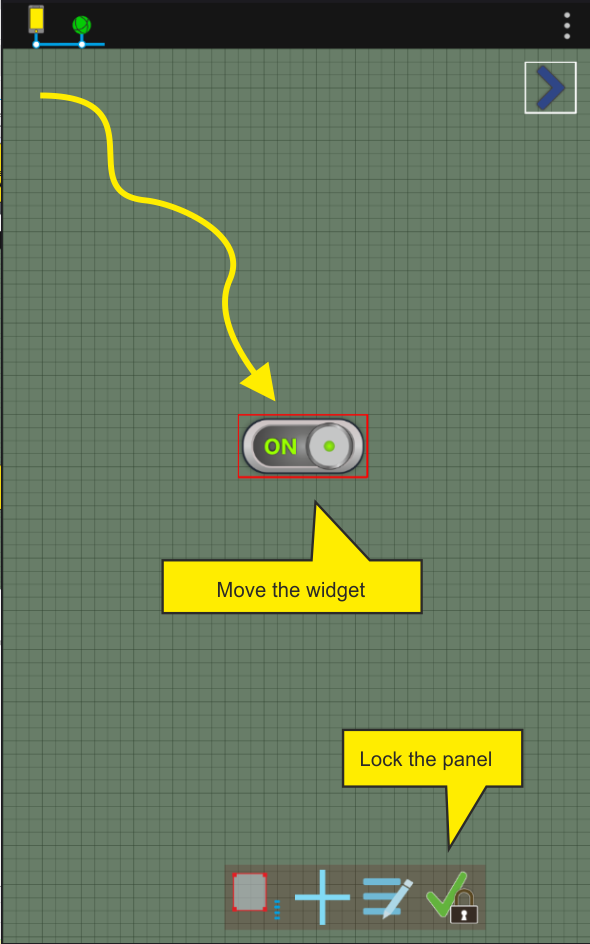
Run Virtuino SE app